Monday, 13 January 2014

Tentang Pelajaran TIK

0 comments
Solusi untuk guru mata pelajaran (mapel) Teknologi Informasi dan Komunikasi (TIK) yang keberadaannya dihapuskan pada Kurikulum 2013 mulai mendapatkan titik terang.

Direktur Pembinaan SMA Ditjen Pendidikan Menengah, Haris Iskandar mengatakan, meski mapel TIK dihapus, namun eks guru TIK tidak akan menganggur.

Menurut Haris, para guru tersebut tetap akan memiliki peran yang penting di sekolahnya masing-masing. Rencananya, kata dia, mereka bisa membantu guru lain dalam mempersiapkan materi ajar.

“Jadi, guru TIK tetap akan berperan penting dalam Kurikulum 2013. Mereka bisa dimasukkan dalam Pusat Teknologi Pendidikan yang ada di sekolah untuk membantu guru dalam mempersiapkan materi ajar,” kata Haris, Sabtu (16/3), saat berada di kampus Universitas Sebelas Maret (UNS) Solo, Jawa Tengah.

Haris Iskandar hadir di kampus FKIP UNS untuk mewakili Wakil Mendikbud, Musliar Kasim yang berhalangan hadir sebagai pembicara dalam seminar Pemetaan dan Pengembangan Mutu Pendidikan Menyongsong Pemberlakuan Kurikulum 2013.

Dalam seminar itu, Haris menilai, saat ini belum seluruh guru mampu menyiapkan materi ajar dengan memanfaatkan multimedia.

Padahal, imbuhnya, Kurikulum 2013 adalah kurikulum teknologi yang dalam pelaksanaannya banyak mengandalkan kerja sama tim.

Karena itu, lanjutnya, Kemdikbud akan menempatkan guru TIK dalam sebuah wadah baru yang nanti akan diberi nama Pusat Teknologi Pendidikan untuk membantu para guru mempersiapkan materi ajar secara multimedia.

Meski demikian, Haris mengakui masih ada persoalan yang terkait dengan sertifikasi guru TIK. Yakni, menemukan jalan keluar bagaimana caranya agar guru TIK yang sudah alih tugas itu tetap memperoleh tunjangan sertifikasi.

“Persoalannya, bagaimana agar mereka tetap mendapatkan tunjangan sertifikasi, sekarang tengah dipikirkan,” tandasnya.

Untuk diketahui, penghapusan mapel TIK pada Kurikulum 2013 telah membuat banyak guru TIK resah.

Selama ini, mereka belum memperoleh kejelasan dari Kemdikbud mengenai tugas baru yang akan diembannya, termasuk pula mempertanyakan masalah tunjangan sertifikasi bagi mereka yang telah menerimanya.

Thursday, 9 January 2014

Bagaimana Cara Belajar Yang Baik ?

0 comments
Cara Belajar yang Baik. Bulan-bulan ini merupakan bulan mendekati ujian semester bagi siswa SMP maupun SMA. Tentunya orang tua lebih memperhatikan dan menerapkan cara belajar yang  baik bagi anaknya agar mendapat hasil belajar yang memuaskan. Para guru pun juga senantiasa menghimbau kepada siswa-siswanya untuk lebih meningkatkan belajarnya agar siswa bisa mengerjakan ujian semester dengan baik. Tentunya dengan memberikan tips cara belajar yang baik.

Berangkat dari cara belajar yang baik, saya mencari beberapa tips cara belajar yang baik di beberapa forum yang memberikan berbagai tips cara belajar untuk anak.

Berikut Cara Belajar Yang Baik

Untuk bisa pandai dan pintar pastinya harus giat dan tekun belajar. Bagaimana cara belajar yang baik efektif dan tepat untuk murid/siswa. Kapan waktu yang tepat agar hasilnya juga maksimal.

Setiap orang bisa menentukan sendiri kapan waktu yang paling tepat untuk belajar. Apakah memilih pagi, sore atau mala hari. Semua sesuai dengan kondisi yang ada. Sebaiknya cara belajar yang baik di lakukan setiap hari, walaupun dengan waktu yang tidak lama. Misalnya 1 atau 2 jam setiap hari.

Banyak sekali murid-murid sekolah saat ini belajar ngoyo hanya jika ada ulangan atau ujian. Waktu yang paling tepat untuk belajar bisa di sesuaikan dengan mood dan toleransi tubuh kita. Tidak harus setiap malam. Kalau kita jam 8 atau jam 9 malam sudah merasa mengantuk bisa memilih waktu sore atau sehabis maghrib.
Jadi waktu belajar seseorang memang tidak bisa sama. Yang penting jangan terlalu memaksakan atau memporsir balajar hingga larut malam karena biasanya hasilnya juga tidak akan bisa maksimal.

Berikut Ini Tips Dan Trik Cara Belajar Yang Baik Untuk Menghadapi Ujian

1. Belajar Kelompok
Bosan belajar sendirian? Coba saja belajar secara kelompok bareng teman. Belajar kelompok merupakan salah satu belajar yang baik dan efektif. Dengan belajar kelompok kegiatan belajar akan menjadi sangat menyenangkan karena ada temannya. Belajar secara kelompok sebaiknya mengajak teman yang pandai dan rajin belajar agar bisa termotivasi dan ketularan pintar.

2. Coba Rajin Membuat Catatan Atau Intisari Dari Pelajaran
Setiap bab pelajaran selalu ada bagian-bagian yang penting. Nah bagian yang penting ini sebaiknya dibuat catatan di buku tersendiri. Cara belajar yang baik dengan merangkum bahan atau materi pelajaran juga sangat berguna saat menghadapi ujian.

3. Selalau Disiplin Dan Tekun Dalam Belajar
Yang penting di sini adalah kualitas belajarnya. Walaupun hanya 1-2 jam sehari tapi kalau di lakukan setiap hari pasti akan lebih baik dari pada belajar dalam waktu yang sangat lama pada waktu tertentu saja. Misalnya hanya belajar kalau ada ulangan atau ujian saja.

4. Bertanya Kalau Belum Paham
Biasanya saat guru selesai membahas satu mata pelajaran akan bertanya pada murid muridnya. Apakah sudah jelas? Jangan ragu dan takut untuk bertanya kalau memang kurang paham atau kurang mengerti.

5. Hindari Sikap Tidak Jujur
Sekarang ini banyak siswa membuat catatan untuk mencontek saat ada ulangan atau ujian. Dengan belajar dengan jadwal yang teratur seorang murid akan selalu siap jika ada ulangan dadakan dan tidak perlu mencontek. Bagaimana dengan tips cara belajar yang baik diatas mungkin masih belum bisa meningkatkan hasil belajar anda?

Tips Cara Belajar yang Baik

1. Ciptakan suasana yang kondusif
Dalam belajar, kamu harus menciptakan suasana yang kondusif, nyaman dan tenang untuk belajar. Cara ini merupakan salah satu cara belajar yang baik karena bagaimanapun jika ingin materi yang kamu pelajari itu bener-bener masuk ke otakmu, kamu harus tenang dan dalam keadaan yang nyaman. Sehingga nggak mengganggu konsentrasi. Belajar di luar ruangan mungkin adalah pilihan yang cukup baik, karena selain lebih fresh, kita juga bisa lebih tenang dan nggak penat dalam belajar.

2. Lihat garis besarnya dahulu
Tips cara belajar yang baik dengan melihat garis besar materi. Jika membaca bahan pelajaran yang baru, jangan langsung menceburkan diri kedalamnya. Kamu bisa lebih meningkatkan pemahaman bila melihat sepintas garis besarnya. Lihatlah semua subjudul, keterangan gambar dan ringkasan yang ada. Jik membaca bacaan yang cukup panjang, maka bacalah dahulu kalimat pertama dari setiap paragrafnya.

3. Buatlah catatan intisari dari bahan pelajaran
Tips cara belajar dengan teknik meringkas intisari dari pelajaran. Kalau kamu meringkas materi dari setiap bahan pelajaran ke dalam sebuah catatan kecil, maka akan sangat membantumu mengingat bahan pelajaran itu. Pada saat kamu menulisnya, kamu pasti membaca materinya lagi, bener kan? Itu akan membuatmu cepat hafal materinya. Sebaiknya catatan itu ditulis kedalam buku kecil atau kertas yang bisa dibawa kemana-mana, sehingga bisa dibaca kapan dan dimanapun kamu berada. Tips Cara belajar yang baik bukan?

4. Berlatihlah tehnik kemampuan mengingat
Cara Belajar Yang Baik dengan teknik kemampuan mengingat. Agar lebih mudah kamu ingat sebaiknya materi yang akan kamu hafal itu diubah menjadi sebuah singkatan atau kata kunci (Mnemonics) dengan formulasi yang mudah diingat-ingat. Seperti MeJiKuHiBiNiU untuk singkatan-singkatan dari warna pelangi, yaitu Merah, Jingga, Kuning, Hijau, Biru, Nila dan Ungu. Walaupun kamu jika menghafal langsung dalam 1 minggu sudah lupa, dengan menggunakan mnemonics seperti ini kamu bisa ingat sampai puluhan tahun lamanya.

5. Belajarlah dengan tekun dan rutin.
Tips cara belajar yang baik dan paling ampuh adalah dengan tekun dan rutin. Belajar tepat waktu dan serius juga sangat berpengaruh dalam peningkatan prestasi belajar, apabila kamu jarang belajar maupun  hanya belajar jika akan ada ulangan pasti prestasinya gak akan maksimal. Jadi belajarlah dengan tekun dan rutin selagi ada waktu untuk belajar. Juga jangan belajar dengan tergesa-gesa pada hari terakhir sebelum ulangan, cara belajar yang baik seperti itu hasilnya juga nggak akan maksimal.

Demikian beberapa tips cara belajar yang baik efektif dan efisien untuk anda coba, semoga sukses!!


Saturday, 11 May 2013

Top Ten Free Online Blogging Platforms

0 comments
A blog is a great way to express your thoughts, create a web presence for your company and provide content to Internet users. If you’re planning to create a blog, but don’t wish to get into the hassles of hosting, developing and deploying it yourself, consider creating a blog at any of the free blogging platforms mentioned below. Such services offer a plethora of features and generally come with both free as well as paid plans.
Let’s look at the top 10 most popular online blog-publishing services.
1. WordPress.com

WordPress.com
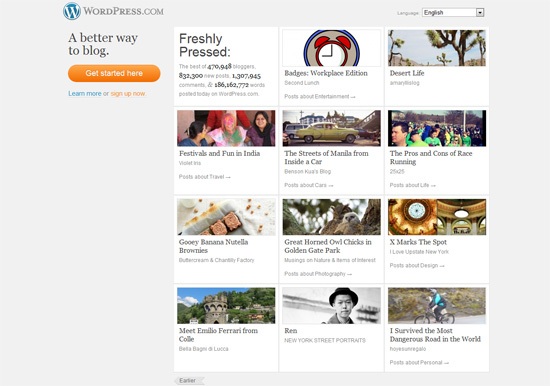
WordPress.com is perhaps the most feature-rich blogging service out there. It uses the popular open source web software WordPress, and offers many features in its free version — traffic stats, anti-spam filters, SEO, gorgeous themes and more.

If you choose to use WordPress.com, you’ll be in good company, as many popular blogs — including CNN’s Political Ticker, People Magazine’s Style Watch and Flickr — are on this platform.
If you need more than what the free version offers, you can opt for their premium features that include custom domains, upgraded web hosting resources and more. Whether you’re an expert blogger or a beginner, this ultimate blogging platform is a safe bet.
2. Blog.com

Blog.com

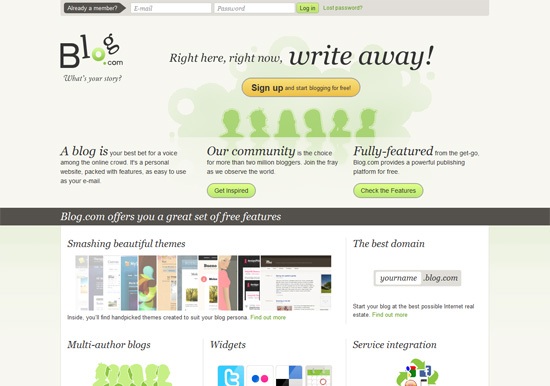
Blog.com is another popular WordPress-powered blogging platform. Just like other services, it has its own share of pros and cons. For a start, it offers many beautiful premium themes in its free accounts, as well as advanced plugins that one can expect only on a self-hosted blog. However, on the downside, the free service displays more ads as compared to WordPress.com. (But you can opt for paid upgrades to remove the advertisements.) The free storage space offered on Blog.com is 2GB in the basic plan, which is less compared to 3GB that WordPress.com gives its users.
3. Blogger

Blogger

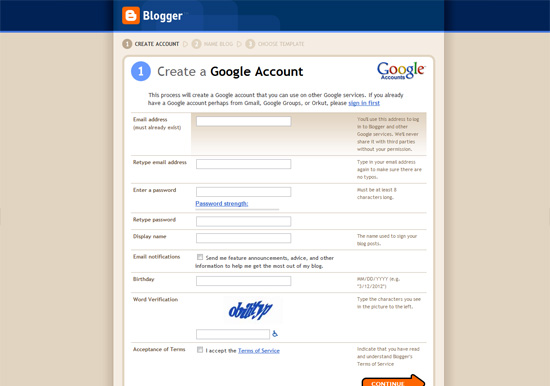
Google Blogger is a well-known blogging service that offers many features to its users. For example, Blogger comes with a Template Designer user interface that lets you tweak your blog’s appearance as much as you want. (However, the templates provided are, in my opinion, no match compared to WordPress themes.)

When it comes to ease of use, most beginners prefer Blogger as it offers a no-nonsense interface for administering your blog and top-notch integration with their Google account. Another great thing about Blogger is that it offers certain great features for free that you normally need to pay for in other blog-publishing services,  most noteworthy being the ability to set up custom domains without paying a cent.
4. TypePad Micro

TypePad Micro

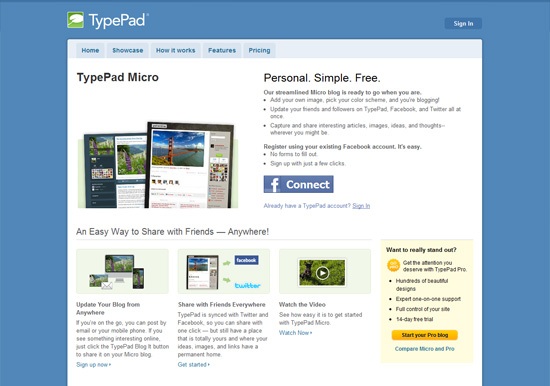
TypePad Micro is another free blog-publishing service. The interface is easy to use, and you can import/export content from many other blogging platforms. However, in terms of add-ons and themes offered, TypePad Micro won’t satisfy even the most basic blogger. The cheapest paid plan begins at $8.95 per month and comes with additional themes, custom domain mapping, as well as technical support.

In an age where almost all blogging services are offering numerous features in their free versions, TypePad Micro seems to be lagging behind.

5. Jux

Jux

Jux is an innovative service that lets you easily share content online. Conventionally speaking, it’s not a blogging service like the ones previously mentioned, however, it has a lot of the same functionalities. Rather, Jux lets you create your own microblogging site for sharing your content. By default, Jux templates don’t have the native sidebars and other widgets that are common to most blogs. Instead, Jux provides a clean (and beautiful) approach to blogging. Simply create an account, and then start sharing your content.

While Jux does seem amazing and has excellent support for mobile devices, it may not be everyone’s cup of tea. For instance, if you’re planning to create a more conventional blog, opting for WordPress might be a better option. On the other hand, if you’re leaning more towards visual content, such as photos and artwork, Jux may just amaze you with its features.

6. Tumblr

Tumblr

Tumblr is a popular and feature-packed microblogging platform. It comes with many outstanding and interesting features such as audio blogging (for sharing your music, for example), free custom domains, hundreds of amazing blogging themes and more. Furthermore, you can sync your Tumblr account with Facebook and/or Twitter so that you can update your social media feeds in a single location. Yet another awesome feature is the ability to create community-powered group blogs. Tumblr also offers support for many third-party apps such as Google Analytics and Feedburner.

7. Posterous Spaces

Posterous Spaces

Posterous Spaces is an excellent online blog-publishing service that is similar to Tumblr.
Posterous Spaces has excellent privacy and viewing features so that you can easily control who can see what on your Posterous Spaces site. It’s designed to allow its users to post content quickly and as hassle-free as possible, so it has loads of features included to facilitate this, such as free mobile apps for iOS and Android smartphones so you can update your blog on the go and a simple, well-designed user interface. Using Posterous Spaces means you’ll be in good company; popular tech startups like MailChimp, TweetDeck and Airbnb leverage Posterous as their company blog.

8. Blogetery

Blogetery

Blogetery is a WordPress-powered online blogging service that offers a modest set of features. Free accounts get nearly 140 themes, custom domain mapping and roughly 40 plugins to choose from.
On Blogetery, ads are displayed on all free blogs, but if you wish to upgrade, you can opt for the paid plan that will cost you $3.50 per month and will give you additional themes, plugins, email support, 5GB of additional storage space, the ability to remove ads, etc.
9. Weebly

Weebly

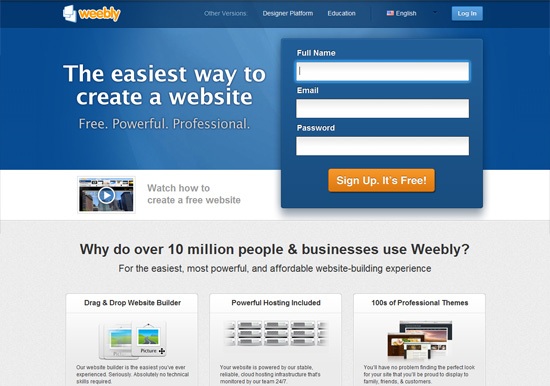
Weebly offers more than just blogging — it’s a fully featured website builder! Weebly’s blog manager features a drag-and-drop interface, support for image galleries, slideshows, video/audio, maps, etc. Additionally, you can opt for their Designer Platform that lets you build websites for your client, thereby effectively using Weebly as a content management system.
10. LiveJournal

LiveJournal

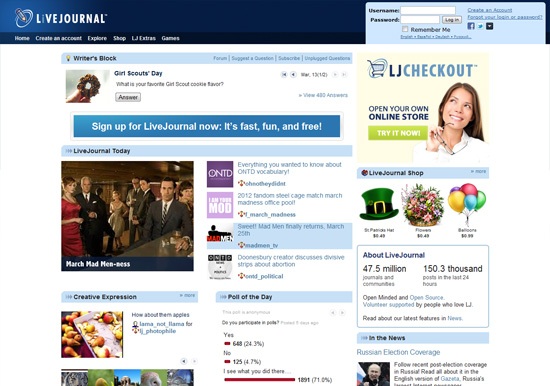
LiveJournal (often abbreviated as LJ) offers blogging with a touch of social networking to it. You can participate in polls, create networks and interact with other LJ users alongside your blog.
With that said, the features, compared to other similar blogging services, are nothing to brag about. Their collection of template is decent, and plugins/extensions are pretty basic in nature.

Monday, 22 April 2013

How To Creating a professional blog with WordPress

0 comments
Wordpress Plugins 
I am with the notion that every professional person should have a blog where they can share their professional knowledge with the world and earn some extra bucks too. Not only professionals actually, these days everyone is starting a blog. From school students to leading business men, everyone is building their online identity with blogging to share their skills and meet other people having the same interests.

However, doing anything consumes time and it gets even more difficult when you need to do it from scratch, without any prior knowledge.
Here in this article you will learn how you can build a professional looking WordPress blog without having any technical knowledge.


“Blogging with WordPress is as easy as writing a diary.”
Well, you can start a WordPress blog without buying a Top Level Domain like for example “www.Yourdomain.com” instead you can get a free sub-domain from WordPress like “www.YOURDOMAIN.wordpress.com”. But, here we are talking about creating a professional blog and having a blog with on a sub-domain doesn’t look professional.

How to buy a Domain Name?

Buying a domain is the trickiest part as you need to be simple and technical at the same time.
You can get a domain name for less than 20 USD, but if you do enough research on Google then you can get a domain for as low as 3 USD.

Step 1 : Picking a Domain Name
Suppose you are a singer and your name is “Harry Potter”.
You should get a domain like “singerharry.com” or “harrythesinger.com” and if you wish to be more name specific then go with “harrypotter.com” simply.
Well, domain name doesn’t really matter much after your blog gets established. Just avoid choosing a domain that is lengthy, misspelled or is difficult to remember. Also, don’t use hyphens while choosing a domain.

I prefer having a “.com” domain and if not that then “.net” is nowhere less. If you run a free organisation or a trust, choose .org domai.
Note: Buying a domain name which refers to another company’s name can lead to legal issues. Also, check whether your Company Name is available in all Social Networks (Vanity URL)

Step 2: Set up WordPress on your Domain
In order to set up WordPress on your domain you have two options.
1. Buy Hosting at your favorite hosting service provider. I recommend you to go for Hostgator or BlueHost.
2. Use WordPress.com

Buying Hosting

Buying hosting for blogging as a total newbie is not smart. Most probably you’ll not get a good hosting experience with free or cheap hosting providers because;
1. Your WordPress Blog will work slower on their low quality.
2. Your WordPress Blog won’t get into Google and other search engines.
3. Hosting Provider will ban your WordPress Blog if your posts fetch a lot of traffic.
Using WordPress.com for Hosting your Blog. You can register an account on WordPress.com for free and use it to set-up a WordPress blog on your domain.

Step 3: Get a Professional looking Theme for your WordPress Blog
Having a professional looking theme installed on your WordPress Blog is must. A good looking website always convinces the visitor to stay on the website.

However, getting a good looking WordPress theme is not that easy. You need to use a theme that doesn’t slow down your blog and is SEO friendly and above all is eye-catching. You get more than 210 themes to use on your WordPress.com blog but you won’t be able to upload custom themes which are a great drawback. Uploading and editing themes is only supported on self-hosted WordPress blogs.

Step 4: Start Posting
Now when you have your blog ready for blogging you can start updating it with relevant information.
You can also join various social networking sites to get maximum exposure and find more people with common interests.

Step 5: Installing Plug-ins
The best thing about WordPress is that it allows you to customize the blog in many ways one of which is using plug-ins. Having necessary plug-ins installed on your WordPress Blog is essential in order to keep your Blog healthy.

Step 6: Social Sharing
There are several social sharing plug-ins available. For example there is a plug-in called “Digg Digg”. It is a Plug-in that adds a social sharing bar on your blog. It makes the sharing of your blog easy and it can gain you good traffic from social networking sites. There are several other social Plug-ins available out there, you just need to get them. I at (ExceptNothing) use TF Social Share.

Step 7: SEO Plug-ins
Wordpress SEO
Keeping your Blog Search Engine Optimized is as essential as filling your vehicle with fuel.
There are several Plug-ins available for free and are very simple to use. I prefer using Yoast Plug-in as it is easy and provides all mandatory features required. You can create an XML sitemap of your site; customize categories, pages, posts etc. according to your needs. For On-Page SEO Plug-ins, you can go for EasyWPSEO or SEOPressor. Both are great choice 

Step 8: Cache Plug-ins
Cache Plugins
Cache plug-ins can make your website faster. They create static HTML files from you dynamic blog. When the HTML file is created the web server will serve that file to visitors instead of those PHP scripts that are comparatively heavier. I prefer using WP Super Cache. It’s simple and dynamic and is simple to use at the same time.

Step 9: Logo
A blog or company’s logo is very important. It determines the Brand Identity. So, if you are good at Designing Logos, you can proceed designing it, or hire a good graphic designer and create a logo for your site. Stuck with creating a logo? Read this: Creating a Logo that will last.

Saturday, 6 April 2013

Install Ginger to Avoid Spelling Mistake For Chrome Users

0 comments
Hi friends. I’m going to share a great free spelling and grammar checking extension for Chrome users. It’s from Ginger.

When there is a grammar topic you don’t fully master, you might repeat the same mistakes over and over, both in writing and speaking. Ginger is the only grammar tool that helps you learn from your own mistakes. If you’re a native English speaker you may not make grammar mistakes. But typographical errors are unavoidable. So for Chrome users I am sharing a great extension. Ginger is providing one of the world’s best spelling and grammar checker for Chrome users.

Ginger 

Install the extension from the below link for free and forget about spelling and grammar mistakes. Now you are only one step away from avoiding grammar and spelling mistakes while typing. Ginger shows a green dotted line below texts with errors. You can right click on the text underlined to correct spelling or grammar mistakes. Ginger shows suggestions so brilliantly.

I find this Chrome extension from Ginger, the world’s #1 contextual grammar and spell checker, very useful. It helps users to avoid spelling and grammar mistakes within Gmail, Hotmail, Yahoo! Mail, Google+, blogging platforms (such as WordPress, Blogspot, LiveJournal) and any other applications using Rich Text Input.

Link : Ginger Spell and Grammar Checker for Chrome

Wednesday, 20 March 2013

How to Create Animated Gif Using Camtasia Studio

0 comments

Have you ever seen moving pictures online and wondered how they are made? Heres how to make a basic GIF picture with Camtasia Studio.
 
What is Camtasia Studio?
Camtasia Studio is an advanced screen video recorder from TechSmith® which has edit, produce, and many more options to enhance your video, all in one program. One of the producing options in this program is GIF for a recorded video, which we will be learning about.
 
How to start
Well first of all, download Camtasia Studio 7.0. There is a 30-day trial version that you can use but also i give out the full version registration code, so download one of these programs and install it on your PC. After you open Camtasia Studio, getting to know your interface would be helpful in the long road, but it’s not necessary.
 
Recording your video
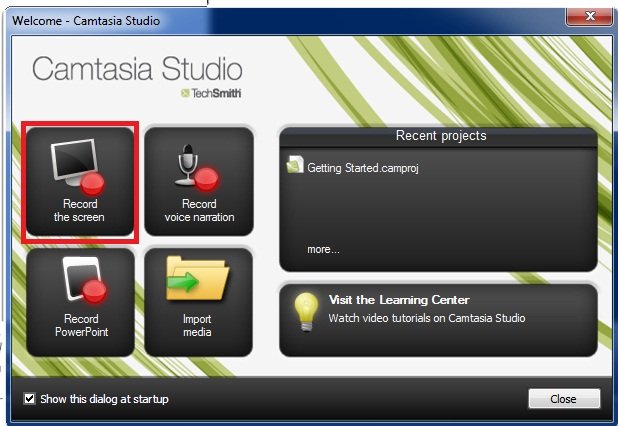
Notice when you first open the program, a window pops up showing 4 options, one being “Record the Screen.” I have illustrated it here:

2

Or you can click on “Record the Screen” in the task list of the interface.

3
 
The next step is self-explanatory, you choose the area you want to record or you choose the whole screen, depends on what you want, then start recording after the 3-second countdown. Stop by pushing F10 or the “Stop” button

Producing it into a GIF animation
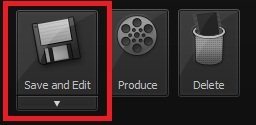
After you finish recording your video, a preview appears and in the corner there are 3 options:
Save and Edit, Delete, and Produce.

4

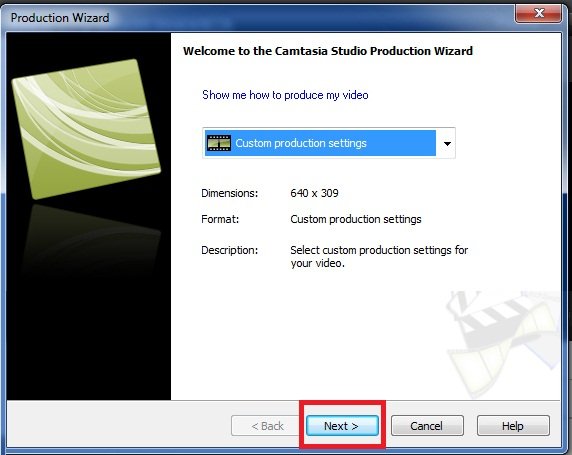
Click on Produce, save your video, and choose “Custom Production Settings” from the drop-down list and click “Next”.

5

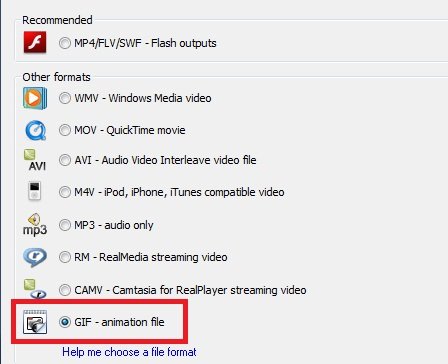
Then comes the Output format screen, which has lots of formats, GIF being one of them, choose it:

6

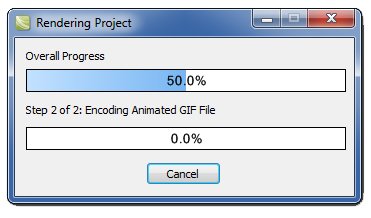
Then click Next on all the following screens, as they are not necessary. You may edit some forms for modified animations but I won’t go there. (On the last form is the name of the video so you should change that.) After clicking Finish on the last screen, it will start converting.

7 
Now this will take some time depending on the length of the video (40 seconds is more than enough). Lagging occurs when the video exceeds 35-40 seconds.And you are done! Your video is now gonna play in picture format, so you can send it to your cell-phone, upload it to your website in the format of a picture!

8

Thursday, 7 March 2013

Windows Live Programs

0 comments
Windows Live is the best online service for email and messenger. This is software you need to download and install. You shall get a lot of services from windows live. It is a free service created by Microsoft. But there are many features that you will need to pay for like the Windows Live Call, which is something like Skype.

Windows Live Mail is the most important application. We can compare it to Outlook Express. It features email, contacts and calendar services. I really like this program. It is better than any other mail client, with a nice user interface. We can use Gmail, Hotmail and any other email services which supports POP and IMAP like the Yahoo mail.


Windows Live Hotmail is the email service that can be used with any Windows Live Service. You only need to create one Hotmail account and use it anywhere on Microsoft website.

Windows Live Messenger is the messenger which has a lot of features. But it lacks the chat room service like that in Yahoo Messenger. But I really am against chat rooms. You won't find one nice person there. Always there will be more than one person typing and doing crazy things.
Windows Live Call works as a part of Make PC-to-PC voice / video calls to your Messenger contacts.

Windows Live Movie Maker is an application to easily create your own movies by using pictures, music, and videos you have. The software is erally good.

There are a lot of other services too, which are being developed as a part. Windows Live Photo Gallery helps you share pictures. Skydrive offers free file sharing up to 5 GB and the size is being increased.

Windows Live Onecare is an anti virus. But it is not free. I have been using a version of this antivirus from Microsoft and have never been in trouble with a virus. The main feature of this antivirus is that it won’t report that a file is a virus un-necessarily. Almost all other anti viruses (excluding McAfee) finds many viruses that are actually not viruses. Live OneCare Family safety is a feature that can be installed to create custom settings for different users on your computer so that they can be protected against illegal and unnecessary content from the internet, including websites and people in the internet.

For Windows Live Register here or download here

Friday, 15 February 2013

Google AuthorRank into its Search Ranking Algorithm

0 comments
Google dominates the search engine market, so whatever it does has an influence on which websites are more visible to potential visitors. PageRank was a system based on variables that ranked a site based on keywords and key-phrases, which and how many other sites link or refer a given website, how many links a website has, and many other factors. Overall, web pages are ranked by hundreds if not thousands of variables. In an attempt to further improve search engine results, Google introduced a system that takes into account any web content author(s).

High-quality authors and content creators can boost the profile of their work and their site with a boost of recognition from new Google's search engine site-ranking system. Content authors are graded on their reputation, credibility and quality of their work. AuthorRank is the name of this new ranking factor, and it's gotten a lot of attention in the media lately.

Features

AuthorRank has several interesting features, such as time-on-site and a system of variables relating to an author's content that basically adds up to a positive-mention count. Time-on-site tracks how long a user stays on a website that appears in Google search results. There is a cutoff time, unspecified at this point, beyond which a site raises its profile on Google's ranking system. The rationale is that if visitors stay on the site longer, they are more likely to be interested and engaged with the site's content. This implies a higher-quality website deserving of better placement in search results.

Another important feature of Google's search ranking system is measures of positive mention, reference by other content and reach of a given author's content. This is a measure of popularity, important to a site's overall ranking. Lastly, AuthorRank-influenced results may look distinct, depending on other information an author provides to Google. Search results influenced by AuthorRank may include author's name and picture in a small tab next to the website link.

Using AuthorRank

If content does not have a reputable author, it may pay to ask a reputable author create some content for your site. Their credibility will likely boost your site reputation. Search engine rank is also driven by social signals such as Facebook "likes," tweets, shares and other indication of popularity, credibility, quality or approval.

Additionally, it is a good idea to generate website content and features to entice a visitor to stay on the site. The longer they stay and browse your site, the better your bounce rate and page views. The logic of this ranking is to get a rough measure of visitors' interest. Two sites may have an equal number of visiting clicks, but if one site has visitors leaving after an average of 15 seconds and the other one has them staying for over 5 minutes, the second site will be seen as more favorable to Google.

Possible Flaws

What is an objective measure of credibility and productivity? For example, how does one rank:
  • a physics professor who wrote a few singularly creative but practically useless articles about possible causes of galactic Dark Flow
  • a financial planner who publishes a few practical articles about investing in unconventional assets
  • a popular and respected plumber who frequently posts about people's propensity to ignore leaks as well as interesting stuff he's found in drain pipes

Basically, AuthorRank digitizes a problem that has plagued the academic world for a long time: the relationship between popularity and quality.

There are other potential pitfalls and possibility for unfairness with implementing AuthorRank. Google may give special prominence to already-established authors at the expense of creating a higher barrier to entry for newer, less experienced authors to gain popularity and site visits.

Friday, 8 February 2013

Handwrite math in over 600+ applications & websites

0 comments

MathType 6.8 takes full advantage of Windows Math Input Panel (available in Windows 7 and later,) which provides support for handwritten math recognition. With MathType and the Math Input Panel you can easily write out your equations and insert them into over 600+ applications and websites.
 
Mouse, tablet, or pen
Although you can handwrite equations using only a mouse, for best results we recommend using a tablet or a pen device.
 
Opens within Microsoft Word
MathType 6.8 adds a button to Microsoft Word's ribbon, and a menu command to MathType. Each brings up the Math Input Panel ready for handwriting equations.
 
Build large equations from small handwritten expressions
While entering math by hand using the Math Input Panel is easy for simple expressions, MathType's editing comes in handy for combining simple expressions to make larger ones or when correcting mistakes. Math Input Panel together with MathType gives you the best of both worlds.
 
We're listening
You can download a 30-day full version of MathType and try MathType's handwritten math and the other new features for free. When you do, we would love to hear what you think. Send us an email or talk with us on
Facebook, Twitter, or YouTube!

Tuesday, 22 January 2013

Audio and Multimedia Software

0 comments
jetAudio

jetAudio supports all major digital audio/video file formats, and CD/DVD*/VideoCD. New Media Center window provides various features including new Media Manager, Explorer window, and Device Manager. You can manage all of your digital media files in Media Manager. Media Manager provides CD Library, Media Library, Automatic Browsing, Playlist and Automatic Playlist.

Ulead VideoStudio

Ulead® VideoStudio 11 is an easy to use software for video editing to easily produce videos with professional appearence, slideshows, and DVDs. Share your movies all over, on iPods, YouTube, or the new HD home theater systems, with full support for discs as AVCHD, Blu-ray and HD DVD.

DVD MovieFactory for TOSHIBA

DVD MovieFactory for Toshiba is an application software already included in our Toshiba portable device. It is also possible to buy on-line, being version no. 6 the latest one. We can use it for managing all our multimedia files in many different ways. We can create, crop,copy, burn, edit, encode, transfer, import, export, audio an video files.

Sound Forge


Sound Forge™ Audio Studio helps yoy to edit and master professional-quality audio on your home computer. Record live instruments and vocals, sweeten and restore audio, apply studio-quality effects, and convert files with lightning speed. You can even create your own karaoke tracks with the Vocal Eraser tool. With a few simple steps, you can produce broadcast-quality audio on your PC.

Saturday, 19 January 2013

Geogebra - Dynamic Mathematics for Everyone

0 comments
GeoGebra is an interactive geometry, algebra, and calculus application, intended for teachers and students. Most parts of GeoGebra are free software. GeoGebra is written in Java and thus available for multiple platforms.

Its creator, Markus Hohenwarter, started the project in 2001 at the University of Salzburg, continuing it at Florida Atlantic University (2006–2008), Florida State University (2008–2009), and now at the University of Linz together with the help of open-source developers and translators all over the world. Currently, the lead developer of GeoGebra is Michael Borcherds, a secondary maths teacher.

After a successful Kickstarter campaign, GeoGebra plans to expand their offerings to include an iPad and Android version.

GeoGebra is dynamic geometry software. Constructions can be made with points, vectors, segments, lines, polygons, conic sections, inequalities, implicit polynomials and functions. All of them can be changed dynamically afterwards. Elements can be entered and modified directly on screen, or through the Input Bar. GeoGebra has the ability to use variables for numbers, vectors and points, find derivatives and integrals of functions and has a full complement of commands like Root or Extremum. Teachers and students can use GeoGebra to make conjectures and prove geometric theorems.

Most parts of the GeoGebra program are licensed under GPL and CC-BY-SA, making them free software. However some parts, including the Windows and Mac installers, have a license which forbids commercial use and are therefore not free software.

Download Free Software geogebra here.  And GeoGebraTube is the official repository of GeoGebra constructions and GeoGebra related resources.

Friday, 20 April 2012

Active GIF Creator 3.5 (AGIF)

0 comments
Active GIF Creator 3.5 (AGIF) is a powerful, intelligible, compact and affordable gif maker for creating and optimization animated GIF- images, buttons, banners and other Web graphic that attract attention of your site visitors.


With Active GIF Creator you can:
  • make GIF and AVI- animations for the Web and presentation materials;
  • make banners;
  • make 2D and 3D buttons;
  • make various graphic using effects and other program tools;
  • add hidden signatures to GIFs to protect them from unauthorized use;
  • develop creative imagination.
 Program features:
- makes animated GIF- files from set of BMP, JPEG, ICO, PCX, PNG, TGA, PSD- files, and Windows Metafiles;
- imports frames from other GIF- files;
- imports and exports AVI- files, ANI- files (animated cursors) and bitmap strips;
- supports clipboard operations for images (BMP);
- manages list of images;
- edits images using internal image editor or script editor;
- duplicates, merges, crops, resizes, rotates and flips frames;
- defines GIF- files global parameters: GIF size, logical screen size, background color index, number of loops in animation;
- defines offset, transparency, interlacement, delay, title and value "how to remove" for each separate image;
- applies effects to whole image or to its rectangle part;
- puts particles on image;
- uses image collections;
- edits color palettes;
- creates 2D and 3D button images;
- creates animation scripts;
- adds and removes text commentaries;
- optimizes size of GIF- files;
- shows GIF size and download time for different speeds of modems;
- allows to preview your GIF- file on Web pages with different backgrounds;
- adds hidden signatures to GIFs to protect them from unauthorized use;
- creates GIF- files from command line in batch mode;
- saves images of GIF- file as a set of BMP, JPEG, PNG, TIFF or TGA- files;
- saves created animation as a project in a file with extension .agif;
- creates maps for tag <MAP> in HTML;
- generates HTML links;
- supports localization tools for different languages.
Reasons to buy Active GIF Creator.
Virtually every popular image editing software title comes with an option to create animated professional looking GIF images. Yet, most people find these built-in tools very counter- intuitive, complicated and almost impossible to use.
  • Active GIF Creator has many useful features, like support of most popular image formats; internal image editor; rich image editing options; image effects; color palette support; import / export to other graphical formats; advanced open picture dialog (thumbnailer); GIF- file size powerful optimization; HTML image map editor; button creator; batch mode; image collections; animation scripts and others.
  • The program's functionality in combination with the low cost has made it the first choice for many users and software evaluation websites. Plus, Active GIF Creator has a user- friendly, international interface and consumes very little system resources.
  • All registered users are entitled to free technical support and minor upgrades.
If looking for a well-rounded, efficient and affordable tool for creating great-looking animated GIF’s, stop by Active GIF Creator! Editors of 3d2f.com named the program "most perspective among competitors".

Download Active GIF Creator 3.5 (AGIF) sofware here

Thursday, 12 April 2012

Mount Everest, How Tall Is It? - A Mathematics Mystery

0 comments


Last night I started to read Mount Everest, The Reconnaissance 1921 which I downloaded for free from Google Books. In the introduction there is a three page explanation of the methods used to measure the height of Mount Everest. An explanation of the differences in measurements is also provided in the introduction. Part of that explanation includes differences in snow fall, cyclical deviations of gravity, and differences atmospheric refraction when observations were made. I'm not a mathematics teacher and will never pretend to be one, but reading that introduction did get me thinking about a possible mathematics lesson.

Applications for Education
Turn to pages 10 through 13 of Mount Everest, The Reconnaissance 1921 and read about the difficulties of accurately measuring Mount Everest in the late 19th and early 20th Centuries. It's interesting to note that most accepted measurements were more than 100 feet higher than today's accepted measurement. Tell your students that Mount Everest has shrunk over the last 100 years and ask them to solve the mystery of the shrinking mountain. 

On a mildly related note and on a promotion of a Mainer note, Snow in the Kingdom: My Storm Years on Everest by Ed Webster is one of the best books ever written about Mount Everest. If you enjoy good adventure stories and or stories about overcoming personal struggles, I think you will enjoy Webster's book. For my money, and I own two copies of it, it is far better than Krakauer's Into Thin Air.

Sunday, 8 April 2012

OpenRocket 12.03-an Open Source model rocket simulator

0 comments

OpenRocket is a free, fully featured model rocket simulator that allows you to design and simulate your rockets before actually building and flying them.
OpenRocket features a full six-degree of-freedom simulation, realistic wind modeling, a multitude of different components including free-form fins and canted fins, clustering and staging. Read more about its features and see screenshots.

OpenRocket is an Open Source project licensed under the GNU GPL. This means that the software is free to use for whatever purposes, and the source code is also available for studying and extending.

Features
General:
  • Fully cross-platform, written in Java
  • Fully documented simulation methods
  • Open Source, source code available under the GNU GPL
User interface:
  • Easy-to-use user interface for rocket design
  • Real-time view of CG and CP position
  • Real-time flight altitude, velocity and acceleration information from a continuous simulation performed in the background
  • Zoomable schematic view of rocket from the side or rear, with rotation around the center axis
Design:
  • A multitude of available components to choose from
  • Trapezoidal, elliptical and free-form fins supported
  • Support for canted fins (roll stabilization)
  • Staging and clustering support
  • Automatic calculation of component mass and CG based on shape and density
  • Ability to override mass and CG of components or stages separately
Simulation and analysis:
  • Full six degree of freedom simulation
  • Rocket stability computed using extended Barrowman method
  • Realistic wind modeling
  • Analysis of the effect of separate components on the stability, drag and roll characteristics of the rocket
  • Fully configurable plotting, with various preset configurations
  • Simulation data can be exported to CSV files for further analysis
  • Simulation listeners allowing custom-made code to interact with the rocket during flight simulation
Download openRocket 12.03

Monday, 2 April 2012

Learning Essentials for Microsoft Office

1 comments

 
Learning Essentials for Microsoft Office is a great application. It focuses mainly on Students and Teachers to help in their school work.

It contains the following programs

(1) Learning Essentials for Students
(2) Learning Essentials for Teachers
They both include a lot of templates you could imagine to be useful in school work. Templates for book report, class debate, essays, etc are for students. All of them have different subcategories like different types of essays, and their formats with a short description on how/what-to-dos

For example,
"Subject:
In a short paragraph, describe the subject of the book.

Setting:
Explain where and when the story takes place.
Tip: it might be helpful to include maps, pictures or historical information about the setting. "
...................
is what I found for a book report.

Even while you are working on the matter in MS Office, a small window still remains on the right side, to help you remind what all things you need to add, the format/style you should follow, etc.

This is really cool

For Teachers, we see lesson plans and assignments, classroom organization, organization of field trips, charts and diagrams, math worksheets and even handwriting practice.
It includes provision for creating content for "Learning Essentials" to help students.

(3) "Learning Essentials Content Development Kit" is a program with a "wizard" interface to help us use the programs easily. It has step by step procedure for selecting the type of document, whether you are a student or teacher, what you want to do, etc.

Download Learning Essentials for Microsoft Office here

Thursday, 29 March 2012

Download MotionBuilder Personal Learning Edition 7.0

0 comments
Autodesk gives industry professionals and those interested in real-time character animation an opportunity to explore all aspects of this award-winning technology while developing new skills. This special version of Autodesk MotionBuilder provides free access to the software, with no time limit, for non-commercial use.

Available for the Windows? XP Professional and Mac OS? X operating systems.
Autodesk MotionBuilder Personal Learning Edition offers almost every feature found in the full

commercial version of Autodesk MotionBuilder including:
Advanced real-time technology
Unique Story Timeline performance environment
Auto rigging, motion editing, motion layering, storytelling tools, and numerous other features for animating your characters
The ability to import and export FBL files to and from Maya Personal Learning Edition software.


Download MotionBuilder Personal Learning Edition 7.0 here

Monday, 26 March 2012

Tips on using the method of creative learning in learning mathematics

1 comments
This article provides a set of tips for raising your awareness of learning styles as a major factor in how children learn. These tips are adapted from the resources listed at the end of this article.

The tips are based on the Dunn & Dunn Learning Styles Model developed by Professors Rita and Kenneth Dunn to assist the New York State Department of Education in improving the effectiveness of instruction for students not demonstrating sufficient progress. The model is based on 20 elements, divided among five categories (called stimuli in the model), that affect learning. Use of the model has been statistically proven to improve student performance.

The model's five stimuli are environmental, emotional, sociological, physiological, and psychological. A nice illustration of the stimuli and elements is here. A very similar model, the Learning Styles Pyramid Model is illustrated here.

The first half of the tips are not specific to Math and apply to a broad range of learning situations. The second half are Math-specific.
  1. Ask your child how he learns best
  2. Notice whether your child learns better in the morning, afternoon, or evening
  3. Introduce a lesson by relating its content to your child's life
  4. Use anecdotes and stories to convey the practical relevance of lessons
  5. Use humor, songs, poetry, cartoons, drama and color to capture attention and stimulate receptivity and learning
  6. Use pictures, drawings, graphs, illustrations, and charts to engage the visual sense
  7. Allow flexibility in lighting (natural, bright, soft, dim, incandescent vs. fluorescent)
  8. Allow flexibility in seating arrangement (experiment with casual and relaxed seating)
  9. Encourage use of white boards, bulletin boards, outside areas, and large floor space for your child to demonstrate what he is learning
  10. Notice whether the room is too cold or too warm for your child
  11. Try incorporating soft background music into the learning environment (with no lyrics to distract)
  12. Notice whether your child prefers to work alone, in a group, or with adult or authority figures
  13. When working in groups, encourage a 60 second break every 15 minutes to review with others, what the children just learned
  14. Explore with your child if he learns best while snacking
  15. For learning about numbers and operations try counters, Cuisenaire rods, blocks, chips, abaci, wooden cubes, and counting sticks
  16. For more advanced learners, try number lines, charts, computers, and calculators
  17. Use card and board games and let your child create his own games
  18. Encourage your child to create his own word problems to provide a context for what he 's learning as well as to support his computation
  19. In early algebra lessons, start with tables and graphs to show relevance of the material
  20. Use geometric models, geoboards, rectangular dot paper, geoblocks, tiles, tangrams, and mirrors to sketch and record shapes
  21. Have kids learn about points, lines, angles and other geometric ideas by using their hands and arms to illustrate the ideas. This can be especially fun if there is a group of kids to illustrate these ideas together.
  22. Support learning of measurement through instruments: rulers, meter sticks, tape measures, trundle wheels, graduated beakers, measuring cups and spoons, kitchen and bathroom scales, thermometers, timers, clocks, and protractors
  23. Try having your child work out a problem on a white board and see if having him stand makes a difference
  24. Encourage your child to talk about what he learned, give feedback, and show him how to apply what he has learned to his life
  25. Use story books to teach Math concepts such as time, money, measurement, and problem-solving
  26. Teach about data analysis, probability, and statistics through newspaper graphics, newspapers, and charts. Also, use dice, coins, cards, colored cubes, chips, spinners, graph paper, squares, calculators, and computers.
I hope when our children no longer allergic to aftermath read this article , and to the parents this is a reference to educate their children to like mathematics .